Print or reprint invoices and credit notes (from Invoicing)
Find this screen
Open: Invoicing > Invoices > Print > Print Invoices
Open: Invoicing > Invoices > Print > Reprint Invoices
Open: Invoicing > Credit Notes > Print > Print Credit Notes
Open: Invoicing > Credit Notes > Print > Reprint Credit Notes
Open: Invoicing > Invoicing List, then select invoice(s) or credit note(s) and select Print or Reprint
Use this to print or reprint invoices and credit notes that you entered in the Invoicing module. To print invoices for sales orders, or print credit notes for sales returns, print these from the Sales Order Processing module. See Print or reprint invoices and credit notes (from Sales Orders).
How to
Choose what to print
You must print invoices and credit notes separately.
You can't change the contents of an invoice or credit note, once it's been printed. You can only change the customer's address or the customer's order number.
You can't print more than 100 invoices or credit notes at a time.
-
Select the required invoices or credit notes from the Invoicing list and click Print. These invoices / credit notes are then displayed on the Print screen.
-
To change the selection, use the selection criteria and click Display.
-
Select the ones that you want to print.
You can use Ctrl+click to highlight multiple invoices or credit notes
Only print invoices and credit notes that use a specific layout
You can filter the list based on the invoice layout used. This is useful, if you need to put special stationery in the printer or if you want to print using a specific layout.
- In the selection criteria, choose All invoices and then Layout.
- Select the required layout from the drop-down list. Click Display.
Print to a different layout
Use this of you want to override the layout set on the customer account.
Choose the invoice or credit note layout that you want to use.
-
If you want to use the layout specified on the customer account, make sure Use alternative layout is not selected.
-
To override the layout on the customer account and use a different one, select Use alternative layout and choose the required layout from the drop-down list.
Reprint invoices and credit notes
You must reprint invoices and credit notes separately. You can't reprint invoices and credit notes if they are on hold or have been cancelled. The reprinted documents have "COPY" printed at the top.
Open: Invoicing > Invoicing List.
-
Select the required invoices or credit notes from the Invoicing list and click Reprint. These invoices / credit notes are then displayed on the Reprint screen.
-
To change the selection, use the selection criteria and click Display.
-
Select the ones that you want to print.
You can use Ctrl+click to highlight multiple individual invoices or credit notes.
Make changes to printed invoices or credit notes
Once an invoice has been printed it becomes a legal document so most information can't be changed.
If you need to need to change the address or customer order number, you can do this when reprinting.
If you need to change anything else such as the invoice date, you'll need to cancel the invoice and recreate it.
Note: You can only make changes to the customer order number for invoices that were created from Invoicing, but not for invoices you created for sales orders.
If you've printed your invoices and your customer's address has changed, you can reprint them and change the address.
-
Select the required document and click Amend Details.
-
Enter the new address or click Copy from customer if the new address has already been updated on the customer's account.
-
Click Save. You can then reprint the invoice or credit note.
If you've printed your invoices and need to change the order number or reference your customer gave you, you can do this by reprinting the invoice or credit note.
-
Select the required document and click Amend Details.
-
Enter the Customer Order Number.
-
Click Save. You can then reprint the invoice or credit note.
Save invoices or credit notes to cloud document storage
You can set up Sage 200 to save invoices and credit notes to cloud document storage when you print (or email) them, so that they can be viewed by everyone.
If the invoice or credit note has been printed (or emailed) and saved to your cloud document storage, you can view it in PDF format.
Open: Invoicing > Invoicing List, then select a single invoice or credit note and click View in Document Storage.
Open: Customers > Customer List, then select the customer and click View in Document Storage.
- The customer's folder is displayed in cloud document storage. The Invoice and Credit Note folders contain the appropriate documents for the customer.
See Save printed documents to cloud document storage.
Useful info
More about document layouts
Invoices and credit notes are printed using document layout files. These document layout files determine the appearance of your invoices and credit notes. You can one of the default layouts that or you can customise a default layout to suit your organisation.
You customise your document layouts using Report Designer (![]() Tools > Run Sage Report Designer). This allows you to:
Tools > Run Sage Report Designer). This allows you to:
- Add your organisation's logo. See Add an image in Report Designer (video).
- Change the text appearance, font and size. See Change the text style in Report Designer (video).
- Change margin, borders, columns.
- Add or remove data fields. See Add a variable in Report Designer (video).
If you save your customised layout with the same filename as a default layout, then your customised layout will be used automatically.
For more information on how to customise your document layouts, see Use custom layouts.
Sage 200 has a set of defaults layouts that you can use 'out of the box'. We recommend that if you want to use customised layouts that you make changes to these defaults.
| Layout Filename | Description |
|---|---|
|
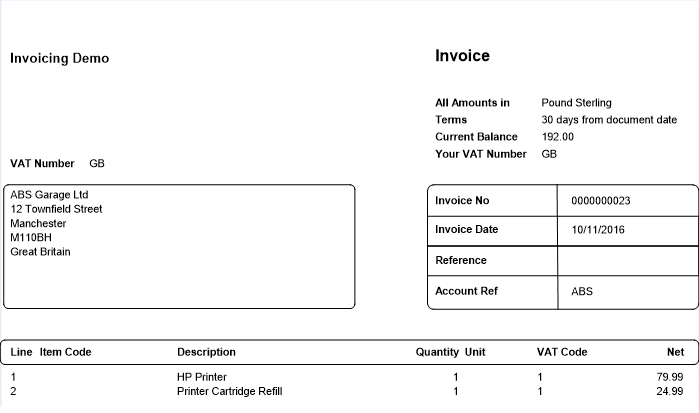
SOP Invoice (Single Plain paper) SOP Credit Note (Single Plain paper) |
Designed to print on single sheets of plain paper with borders to define the sections.
|
|
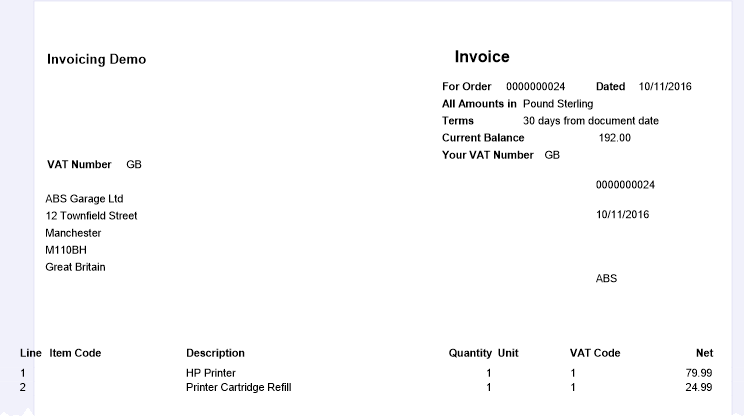
SOP Invoice (Single) SOP Credit Note (Single) |
Designed to use with our pre-printed stationery. Does not have borders to define the sections.
|
|
SOP Invoice (Continuous) SOP Credit Note (Continuous) |
Designed to print on our pre-printed continuous stationery. |
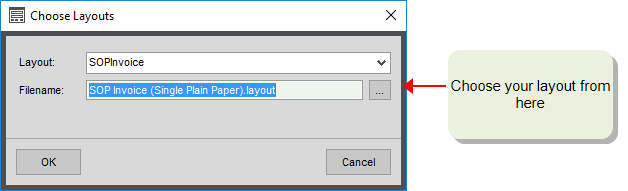
Choose the layout that you want to use as the default.
Open: ![]() Tools > Choose Layouts.
Tools > Choose Layouts.
- Choose one for the following from the Layout drop-down list:
- SOP Invoice
- SOP Credit Note
-
Click the Browse button next to Filename and choose the layout you want to use.
- Default layouts can be found here: default > layouts.
- Customised layouts can be found here: custom > layouts
If you want to use more than one layout, then you need to:
-
Add each one to Sage 200.
Open: Settings > Invoicing and Sales Orders > Maintain Invoice Layouts or Maintain Credit Note Layouts.
-
Click Add and select the layout file from the options available in the Layouts folder.
This add the new layout to layout list. Each new layout has a label of SOPinvoice2, SOPInvoice3 etc.
- To make the new layout the default, click Default.
-
-
Choose the layout to use on each customer account
Open: Customer List > Amend Account | Documents.
- Select the sales invoice layout to associate with the customer account from the Sales invoice layout drop-down.
- Select the sales credit note layout to associate with the customer account from the Sales credit note layout drop-down.
Emailing invoices and credit notes to customers
If you want to email invoices / credit notes, then you need to use a special email layout and use the email option from the Invoicing list.
See Email invoices and credit notes (from Invoicing).
Fix it
'There are no invoices/ credit notes to print' message
This means that Sage 200 can't find any invoices or credit notes that are ready to print, using the filter criteria you've entered. To resolve this:
-
Try changing the criteria.
-
Check that the invoices or credit notes are not on hold or printed already.
'The report could not be generated' message
You may see the following message if you have selected to print too many invoices or credit notes at a time: The report could not be generated. The formatter threw an exception while trying to deserialize the message.
To resolve this you'll need to print your invoices or credit notes in batches of 100 or less.
What happens when
An invoice / credit note is printed
-
The status is changed to Printed.
-
Depending on your settings, the document is:
-
Shown on screen as a preview.
-
Sent to your printer.
-
Sent to the Spooler to be printed later.
Note: You can change this here
 Tools > Choose Output Mode.
 -